

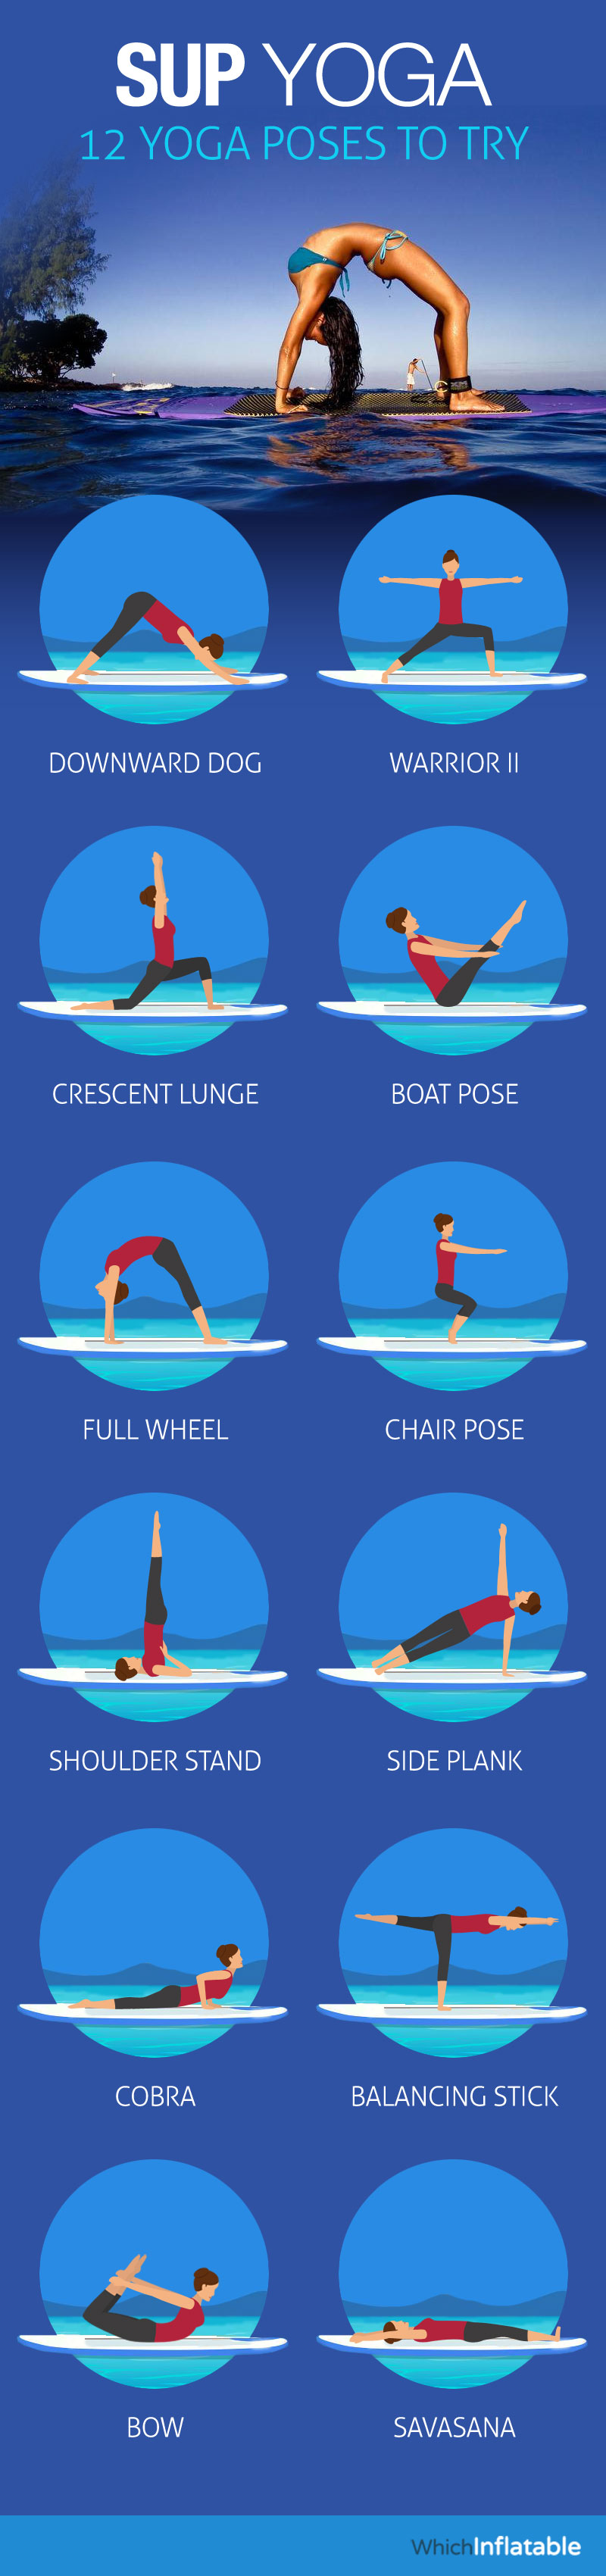
Strong Core and Flat Belly with Yoga!
If you’re anything like me, the idea of doing abdominal crunches
for toned abs and a flat belly is enough to send you running away from
the gym. Fortunately, you don’t have to do crunches to have a strong
core… Here are 4 beginner yoga poses that anyone can do for a strong
core and flat belly!
Using yoga for a flat belly! Here’s how:
Learning
how to engage the deeper muscles that support the trunk, hips, and even
shoulders allows you to co-ordinate the power of the lower body with
the agility of the upper body.
Using your core this way,
especially while you’re moving, creates functional stability in
everything you do – from sports, to lifting up your kids, working in the
garden, or walking safely on icy or slippery ground.
Here are four simple core stability exercises you can do at home, with no equipment other than your own body.
If you’re
new to exercise, or have back, shoulder or wrist injuries, do check
with your doctor or physical therapist to ensure these exercises are
safe for you.
1. Knee Lifts
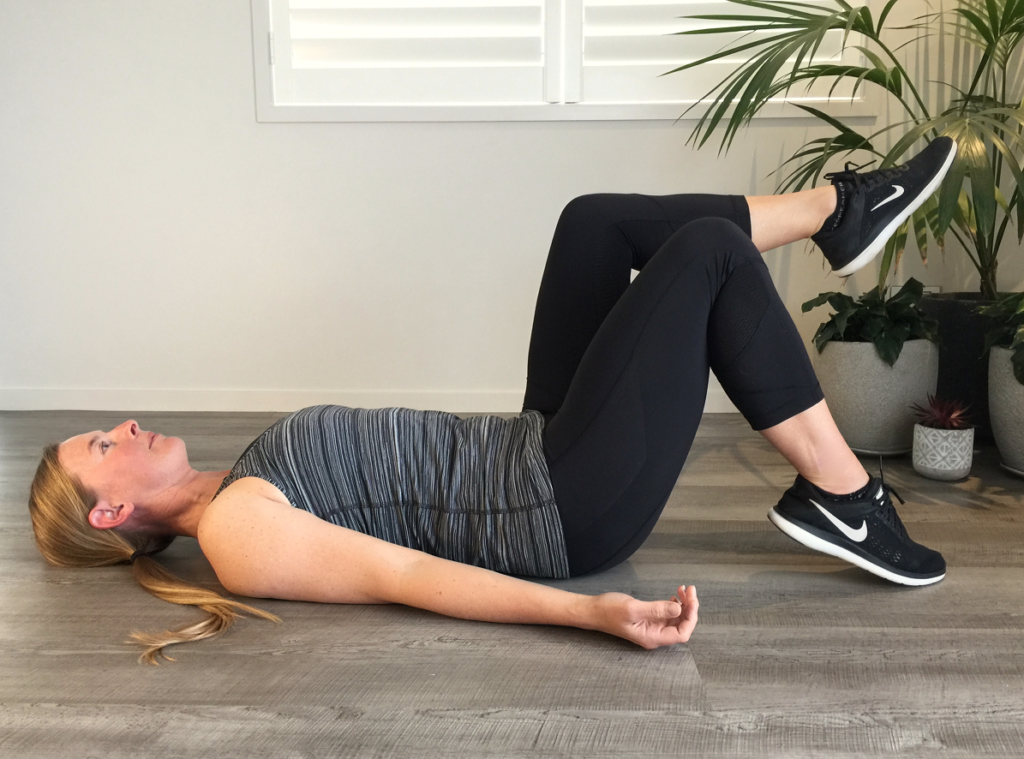
This
simple exercise connects you to your deepest abdominal muscle, which
wraps around the waist and supports the lower back. Think of it as your
corset muscle.
Lie on your back with your feet on the floor and
your knees bent at 90-degrees. Place the heels of your palms onto your
front hipbones, thumbs toward your navel and fingers toward your pubic
bone. Imagine tying a string around your waist, and feel how the belly
becomes flat and firm as you hug all four sides of your waist into the
midline.
You can keep your hands here, or relax them by your sides.
Maintaining
this set up, lift your right foot off the floor, keeping the same
90-degree angle at the knee. Swap feet in mid-air, keeping your belly
flat and firm, and your hips as still as possible. Repeat 10 times per
leg, then return both feet to the floor. Windshield wipe your knees side
to side to rest, then repeat.
Need to back off?

If
you feel your lower back pulling away from the floor, or your belly
bulging, bring the first foot back to the floor before lifting the
second one. You could also press your palms down to the floor beside you
for extra support.
Want to amp it up?
Next time, start
with both feet lifted, knees stacked over hips with a 90-degree bend in
your knees. Keeping the same angle in the right knee, touch the toes to
the floor. Swap legs in mid-air, still keeping your belly flat, your
hips steady, and your breathing relaxed.
After this amazing series, get THE yoga tip for a flat belly!
2. Walking Bridge
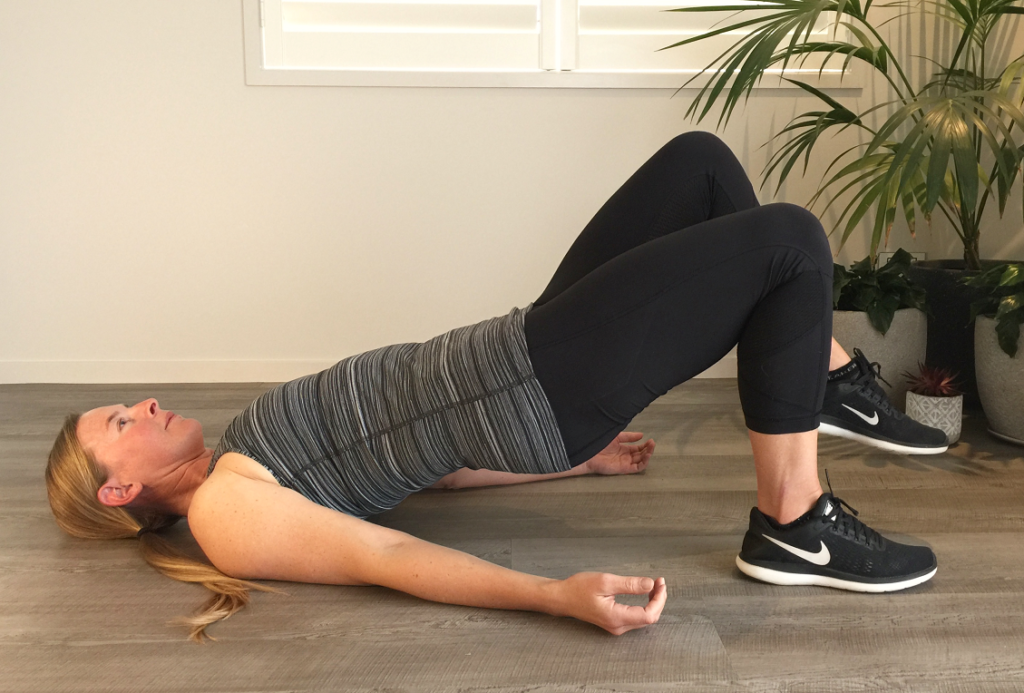
This exercise builds on the waist activation we created above, adding stability work for your hips.
Lie
on your back with your knees bent. Set your feet hip-width apart, close
to your buttocks. Re-create the feeling of “hugging in” around your
waist, then lift your hips until you have a straight line
between shoulders and knees. Rather then clenching your buttocks,
lengthen your sit bones towards the backs of your knees.
You might even feel your buttocks with your hands to ensure they aren’t gripping your lower back.
Maintaining
this alignment, slowly hover your right foot just above the floor,
keeping your hips as still as possible. Swap sides, slowly walking the
feet while aiming to keep your hips from rocking side to side. Repeat 10
times per side, before settling both feet and your hips back down onto
the floor. Hug your knees into your chest for a rest, then repeat.
Need to back off?
If
you can’t keep your hips stable, try lifting to tiptoes, one foot at a
time, rather than lifting your foot entirely off the floor.
Want to amp it up?
Next
time, try the exercise with your support foot on tiptoes. This
decreases the amount of surface area on the floor, making it
more challenging for you to retain your balance.
3. Bird Dog Flow
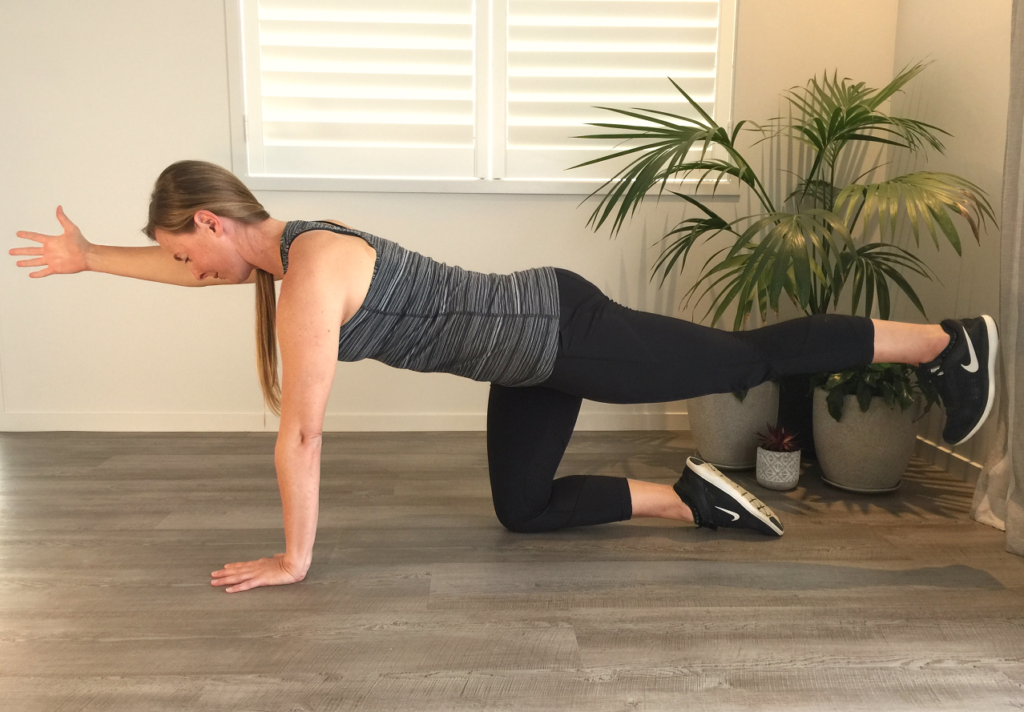
Here
we continue to engage waist and stabilize the hips, and add some work
for the small, deep muscles that stabilize your shoulders.
Set up
on all fours, wrists under shoulders and knees a little narrower than
your hips. Feel your shoulders and hips parallel to the floor, firm your
belly and narrow your waist. Extend your right leg straight out behind
you, lengthening your tail and spinning your inner thigh towards
the ceiling to keep your hips square. Press into your right hand to
lift your ribcage away from the floor and send your right shoulder down
your back to lengthen your neck. Then reach your left arm forward,
extending hand away from foot. Return back to all fours to swap.
Continue flowing from side to side, extending opposite arm and leg,
keeping your shoulders and hips as steady as you can.
Complete 10
times per side, before returning to all fours. Stretch your hips back
to your heels to rest in Childs Pose, then repeat.
Need to back off?
If you are struggling with your balance, keep both hands on the floor and simply flow your legs from side to side.
Want to amp it up?
Next
time, hover your support foot, reducing the surface area in contact
with the floor, so that you’re balancing just on your support knee and
hand.
4. Side Plank Flow
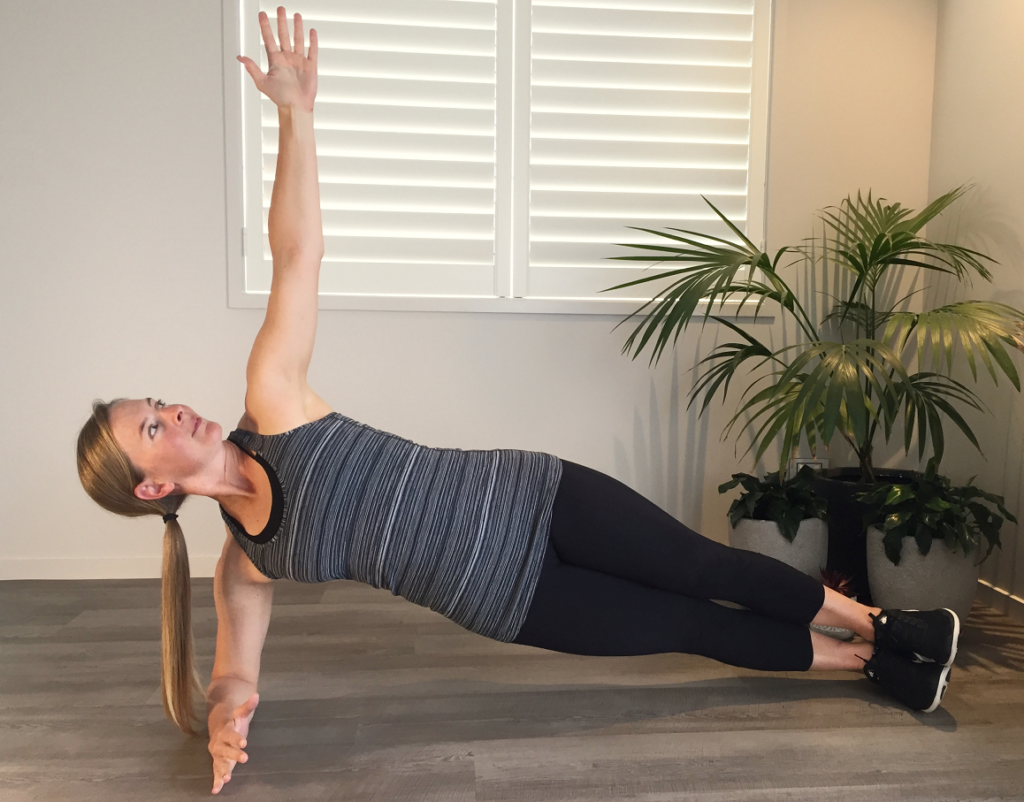
This exercise maintains core, hip and shoulder engagement, while challenging the muscles of your side waist.
Lie
on your right side, setting your elbow under your shoulder and your
feet on top of each other. Extend your left arm to the ceiling, feeling
your shoulders and hips stack, your belly firm and your waist narrow.
Press down into your right elbow to draw your right side ribs away
from the floor, and contract your right side waist to lift your hips
high. Without allowing hips or shoulders to twist, or collapsing into
your right shoulder, bring your hips down to hover just above the mat
before raising them again. Do 5 hip lifts, then slowly lower to the
floor to swap sides. Roll onto your back to rest, then repeat.
Need to back off?
If you are unable to maintain stability, bring your lower knee to the floor for some extra support.
Want to amp it up?
Next
time, raise your top leg off your bottom leg, or try turning your body
down toward the floor into a forearm plank to swap sides.
Wrap-Up
And there you have it beginner yoga for a strong core and flat belly!
Without
doing a single crunch, you’ve learned how to use the deep muscles of
your core to stabilize your hips, spine, and shoulders even while you’re
moving.
As you continue your day, notice that you can use these same muscles to create a sense of stability in everything you do.


